Monday, December 12, 2011

Battery ใหม่

เดิม ใช้ battery panasonic ลูกสีแดงน่าจะเป็น 46B24R มองผ่านตาแมวใสปิ้งมานานแล้ว แต่เห็นว่า ไฟติดเพลงดัง start ก็ทีเดียวติด ก็เลยยังไม่เปลี่ยนใช้มา 3-4 ปีแล้ว อาทิตย์ที่ผ่านมามีอาการ start 2-3ทีถึงจะติดผ่านมาอาทิตย์ได้กำลังจะออกไปข้างนอก แต่ start รถไม่ติดลองหลายทีแระ เลยต้องให้พี่มาพ่วง batt
สุดท้ายเลยต้องเปลี่ยน ก็เอา panasonic เหมือนเดิมแล้วกัน แต่คุณสมบัติเปลี่ยนไป

PANASONIC 46B24L-MF


แบบ Maintenance Free ไม่ต้องเติมน้ำกลั่น(บ่อย)


หมดไป 2300

เปลี่ยนแม่ปั้มเบรค

อาการคือ ตอนเหยียบเบรคแล้วมันจะหวืดคือเบรคจมลงไปต้องเหยียบซ้ำ บ้างครั้งก็ ต้องย้ำหลายครั้งก็เกือบชนก้นชาวบ้านเหมือนกัน เป็นมานาน แต่ยังไม่ได้ทำ ตอนนี้ได้เวลาทำซักที
ช่างบอก แม่ปั้มเบรคมีปัญหา ข้างในแกนมันไม่เรียบทำให้ลูกยางดันเข้าไปแล้วมีอากาศ เลยต้องเปลี่ยนใหม่

แม่ปั้มเบรคตัวเก่า


ของใหม่


น้ำมันเบรค

ค่าเสียหาย แม่ปั้มเบรค 2800
น้ำมันเบรค 200
ค่าแรง 400

น้ำท่วมลาดพร้าว


น้ำท่วมลาดพร้าว
ขึ้นมาจาก Mrt ตกใจกับภาพที่เห็น มาเจอกับของจริงเลยเก็บไว้ในความทรงจำว่า น้ำท่วมลาดพร้าว

Tuesday, November 29, 2011

How to audit and track file deletions

Enable Audit Policy: On the machine where you want to track file deletion, go to Administrative Tools->Local Security Policy->Audit Policy , double click "Audit Object Access" on the right pane and switch-on "Success" & "Failure".
Enable auditing for user/group: You'll need to enable and add user/security group for auditing on the folder which needs to be captured for file deletion.
Right click on the target folder (ex. C:\Program Files\Honeywell), select Properties and go to Security Tab.
Click on Advanced , and select Auditing Tab.
Add here the security group which would include the user who you think might be deleting the file. If you are not sure, include EVERYONE .
On the next screen select "Successful" & "Failed" on "Delete subfolders and files" & "Delete". Apply new settings and exit from properties.
These configurations will generate file/folder access audit logs for the configured folder in Securit Event Logs . Since we are interested in only the logs that show details of file/folder deletions, we'll need to look for Security Logs with event ID 560 .
Any file deletion operation will generate two events with event ID 560. After you've realized that your target file has been deleted, you'll need to filter the security log view to show only logs with event ID 560 (right click on Event Viewer->Security, select Filter...).
If you quickly want to find out if your configured machine generated any file deletion event log, run the following command on your own (networked) machine. This will work only on XP and above, therefore, you can use this to query for security logs from Windows 2000 machines. Run cscript //h:cscript //s //nologo at least once on your system before executing the following command.

eventquery.vbs /S /FI "ID eq 560" /L Security /V
/FI : Filter
/L : Log name {Application | Security | System}
/V : Verbose output


Ref:http://sogeeky.blogspot.com/2006/07/how-to-audit-and-track-file-deletions.html

Sunday, October 09, 2011

Adsense


Tuesday, September 27, 2011

Add a License Key to Exchange Server 2007


From the Shell (EMS), you can enter the product key using the Set-ExchangeServer cmdlet:
Set-ExchangeServer SERVERNAME -ProductKey aaaaa-aaaaa-aaaaa-aaaaa-aaaaa
To get a list of all Exchange 2007/Exchange 2010 servers and their product keys and trial status, including number of days left:

Get-ExchangeServer | Select name,ProductID,*trial*

(Note: I typically format this as a list rather than a default table, particularly for a smaller number of objects. The table tends to chop off bits of a field when you have too many fields displayed:

Get-ExchangeServer | Select name,ProductID,*trial* | fl

The output looks something like this:

Name: E12EDGE
ProductID:
IsExchange2007TrialEdition: True
IsExpiredExchange2007TrialEdition: False
RemainingTrialPeriod: 29.19.12.55.8950288

Yes, the timing displayed is very precise, down to the seconds and milliseconds :) – but you can probably tell it’s 29 days.

Friday, September 02, 2011

ไม่มี share folder ของ netlogon และ sysvol เมื่อเราทำการรีสตาร์ทเครื่อง DC (Windows 2003)

ในบางครั้งเครื่อง DC (Windows 2003) ของเรา ไม่มี share folder ของ netlogon และ sysvol เมื่อเราทำการรีสตาร์ทเครื่อง จะมีวิธีการแก้หลายวิธี ก่อนที่จะทำตามวิธีเหล่านี้ อย่าลืม backup ไว้ก่อนด้วยนะคับ
วิธีที่ 1 ตามลิงค์นี้ http://support.microsoft.com/kb/315457 วิธีนี้จะเป็นให้แก้ BurFlags registry ที่ HKEY_LOCAL_MACHINE\SYSTEM\CurrentControlSet\Services\NtFrs\Parameters\Cumulative Replica Sets\GUID เป็น D4 สำหรับเครื่องหลัก ส่วนเครื่องอื่นเป็น D2
วิธีที่ 2 ตามลิงค์นี้ http://support.microsoft.com/kb/947022 วิธีนี้จะแก้ค่าของ SysvolReady registry ที่ HKEY_LOCAL_MACHINE\SYSTEM\CurrentControlSet\Services\Netlogon\Parameters ให้เป็น 1
วิธีที่3 ให้ทำการ 1. Stop NetLogon and FRS on the domain controller. 2. rename the Ntfrs.jdb file to Ntfrs.jdb.tmb in the \Ntfrs\Jet folder. 3. rename the Edb.chk file to Edb.chk.tmb in the \Ntfrs\Jet\Sys folder. 4. rename the Edb.log file, the Res1.log file, and the Res2.log file to Edb.log.tmp file, the Res1.log.tmp file, and the Res2.log.tmp in the\Ntfrs\Jet\Log folder. 5. Restart the NetLogon and FRS services on the domain controller.
Ref : http://itvithblog.exteen.com/20100512/share-folder-netlogon-sysvol-dc-windows-2003

Tuesday, August 30, 2011

Increase Your VMware Virtual Hard Disk Size ( vmdk file )

Required Tools

VMWare Product : Working Virtual machine and Vmware Workstation (it will work with other vmware product such as GSX Server and VMware Server).
GParted LiveCD : Third-party utility to expand the size of a virtual disk.

Step # 1: Shutdown The Guest Operating System

Shutdown and poweroff Windows Vista.

Delete all your snapshots from snapshot manager by visting VM > Snapshot Manger. Since you are going to resize you virtual disk, these snapshots going to create a problem for you.

Backup your entire virtual machine. My VM is located at /share/vms/WindowsVista. So I made a backup:
# cp -arv /share/vms/WindowsVista /safe/path/to/vm/05062009/
OR
# rsync /share/vms/WindowsVista user@lan.nixcraft.net.in:/.dumps/vms/05062009/
Another option is you can clone your guest in VMware, if you want to keep the existing virtual machine configuration by visiting VM > Clone option.
Step # 2: Increase Your Virtual Machine's Disk Capacity

Open shell prompt and type the following command:
# /usr/bin/vmware-vdiskmanager -x {diskSize}GB yourvm.vmdk
If you are using Windows operating host system change directory to C:\Program Files\VMware\VMware Workstation or add this to your PATH settings. Click on Start > Run and type cmd to open Windows shell prompt:
vmware-vdiskmanager -x {diskSize}GB "c:\vm\yourvm.vmdk"
OR use full path as follows
C:\Program Files\VMware\VMware Workstation\vmware-vdiskmanager -x {diskSize}GB "c:\vm\yourvm.vmdk"
Example: Increase Size to 32GB

Linux host example:
# /usr/bin/vmware-vdiskmanager -x 32GB /share/vms/WindowsVista/vista.vmdk
Windows host example:
C:\Program Files\VMware\VMware Workstation\vmware-vdiskmanager -x 32GB "c:\vm\centos.vmdk"
Step # 3: Expand The Size Of a Virtual Disk

Now, disk size is increased but operating system will only show 16GB used and 16GB unused. To add new 16GB to C: (i.e. expand the size of a a virtual disk), use GParted. You will need to use a third-party utility such as GParted to resize the expanded partitions. The GParted application is the GNOME partition editor for creating, reorganizing, and deleting disk partitions. GParted is a live Linux based CD. Download latest version here or use wget command as follows:
$ cd /tmp
$ wget http://nchc.dl.sourceforge.net/sourceforge/gparted/gparted-live-0.4.5-2.iso

Start Vmware

Select your VM (such as Windows Vista). Click on VM menu > Select Properties > Select CD / DVD > Use ISO Image > Click on Browse > Select /tmp/gparted-live-0.4.5-2.iso > Ok > Save.
continute http://www.cyberciti.biz/tips/howto-resize-vmware-virtual-harddisk-size.html

การกำหนด password ของ root ใน UBUNTU

สำหรับการติดตั้ง Linux UBUNTU แล้ว จะไม่มีให้กำหนดรหัสผ่าน ของ root นั้น แต่เราสามารถกำหนดได้โดยวิธีดังนี้
login ด้วย user ของเราที่กำหนดไว้
แล้วพิมพ์แบบนี้
$sudo passwd root
ใส่รหัสผ่านของ user เราก่อน พอขึ้นข้อความ
Enter new UNIX password:
Retype new UNIX password:
ก็ใส่รหัสผ่านของ root ได้เลย

สำหรับการกำหนดให้ sudo ไม่ต้องถามรหัสผ่านเวลาใช้ sudo
สั่ง sudo pico /etc/sudoers (ระบบจะถามรหัสผ่านก่อน)
ใส่บรรทัด myusername ALL= NOPASSWD: ALL (myusername คือ user ของเรา)
สมมุติ ว่าตอนเราติดตั้งได้สร้าง user คือ paitoon
# /etc/sudoers
#
# This file MUST be edited with the 'visudo' command as root.
#
# See the man page for details on how to write a sudoers file.
# Host alias specification

# User alias specification

# Cmnd alias specification

# Defaults

Defaults !lecture,tty_tickets,!fqdn

# User privilege specification
root ALL=(ALL) ALL
paitoon ALL= NOPASSWD: ALL
# Members of the admin group may gain root privileges
#%admin ALL=(ALL) ALL

ref: http://mrkohkoh.exteen.com/20061015/password-root-ubuntu

Wednesday, August 10, 2011

The evaluation period for Microsoft Lync Server 2010 is about to expire

Updating From the Evaluation Version of Microsoft Lync Server 2010

If you have installed the Evaluation version of Microsoft Lync Server 2010, you will eventually need to update that installation a licensed copy of the software; that's because the evaluation version expires 180 days after it was installed. However, you will not need to completely uninstall the evaluation version and then install the licensed version. Instead, after you have obtained a valid licensing key, you can update the evaluation version of Lync Server 2010 by carrying out the following procedure on each computer acting as a Lync Server Front End Server, Director, or Edge Server. Note that you do not have to update computers carrying out other server roles, such as a Monitoring Server or Archiving Server.


- Lync Server Management Shell
- msiexec.exe /fvomus server.msi EVALTOFULL=1 /qb
Note that you might need to specify the full path to the file server.msi. This file can be found in the Setup folder of the Lync Server Volume media installation files
- Enable-CsComputer
- Get-CsServerVersion
will analyze the local computer and report back one of the following:
That the Lync Server volume license key has been installed on the computer, meaning that no updating is necessary.
That the Lync Server evaluation license key has been installed, meaning that the computer must be updated.
That no volume license key is required on the computer. Updating from the evaluation version to the licensed version is only required on Front End Servers, Directors, and Edge Servers.

Ref : http://technet.microsoft.com/en-us/library/gg521005.aspx

Monday, August 01, 2011

Sony 32CX520 LCD TV

ถอย Sony 32CX520 LCD TV ที่งาน Power Buy Expo 2011 เนื่องจาก 14 นิ้วตัวเก่าไม่มีภาพมีแต่เสียงลองย้ำลายปริ๊นแล้วไม่หายจึงตัดใจ


ขนาดของจอ LCD 32 นิ้ว (81 ซ.ม.) 16:9
ระบบ TV Digital: DVB-T Analog: B/G, D/K, I, L, M
ระบบสี NTSC 3.58, NTSC 4.43, PAL, SECAM
สัญญาณวีดีโอ 480/60i, 480/60p, 576/50i, 576/50p, 720/50p, 720/60p, 1080/50i, 1080/60i, 1080/24p (HDMI™ only), 1080/50p (HDMI™ / Component), 1080/60p (HDMI™ / Component)

ภาพ
ความละเอียดในการแสดงผล Full HD 1080 (1920 x 1080)
วงจรประมวลผลภาพ ระบบประมวลผลภาพ X-Reality
ประเภทหลอดแบ็คไลท์ CCFL
Live Colour™ ใช่
Deep Color ใช่
Intelligent Image Enhancer ใช่
Intelligent MPEG Noise Reduction ใช่
Advanced Contrast Enhancer (ACE) ใช่
24P True Cinema™ ใช่
PhotoTV HD ใช่
มุมมอง 178° (ขวา/ซ้าย), 178° (บน/ล่าง)
รูปแบบจอภาพ TV: Full/ Normal/ Wide Zoom/ Zoom/ Caption/ 14:9, PC: Full 1/ Full 2/ Normal
โหมดภาพ Vivid/ Standard/ Custom/ Cinema/ Game-Standard/ Game-Original/ Graphics/ Sports/ Animation/ Photo-Vivid/ Photo-Standard/ Photo-Original/ Photo-Custom
CineMotion/Film Mode/Cinema Drive ใช่
3D Comb Filter ใช่

เสียง
โหมดเสียง Dynamic / Standard / Clear Voice
โหมดเสียงเซอร์ราวด์ ภาพยนตร์ / เพลง / กีฬา / เกม
Sound Enhancer ใช่
S-Master ใช่
S-Force S-Force Front Surround 3D
Dolby® Dolby® Digital/ Dolby® Digital Plus/ Dolby® Pulse
เสียงแบบ Simulated Stereo ใช่
ระบบสเตอริโอ NICAM, A2
กำลังขับเสียง 20วัตต์ (10วัตต์ x 2)

ช่องต่อสัญญาณ
HDMI™ / Audio In 4 (1 ข้าง/ 3 หลัง)
USB 2.0 2 (ข้าง)
การเชื่อมต่อ Ethernet 1 (หลัง)
ช่องต่อเข้าวีดีโอ Composite 2 (หลัง/ 1 ไฮบริด)
ช่องต่อเข้าวีดีโอ Component 1 (หลัง/ ไฮบริด)
ช่องต่อเข้า RF 1 (หลัง)
ช่องต่อเข้า PC HD15 1 (ข้าง)
Digital Audio Output(s) 1 (หลัง)
Audio Out 1 (ข้าง)
Headphone Out 1 (ข้าง)

คุณสมบัติอื่นๆ
BRAVIA Sync ใช่
DLNA ใช่
Photo MAP ใช่
Quick Start & Viewing ใช่
Remote Keyboard (VAIO) ใช่
Picture Frame Mode ใช่
การเล่นไฟล์ผ่าน USB ใช่ (วีดีโอ, เพลง, ภาพนิ่ง)
เลือกฉาก Photo/ Music/ Cinema/ Game/ Graphics/ Sports/ Animation
การควบคุมสิทธิ์การเล่น ใช่
นาฬิกา ใช่
ตั้งเวลา Sleep Timer ใช่
ตั้งเวลาเปิด/ ปิด ใช่
Teletext ใช่ (2000 หน้า)
PAP (Picture And Picture) PAP (ปรับได้)
PIP (ภาพนิ่งซ้อนในภาพนิ่ง) ใช่
ปรับหมุนซ้าย-ขวา / ปรับก้ม-เงย ใช่ (ซ้าย 20°/ ขวา 20°) / -

คุณสมบัติด้านเน็ตเวิร์ค
Wi-Fi Direct Network Update (ต้องเชื่อมต่อผ่าน Wi-Fi adaptor UWA-BR100)
Skype™ Ready ใช่ (ต้องใช้กล้อง CMU-BR100)
TrackID™ ใช่
Video Search ใช่
Media Remote ใช่ (ผ่านการอัพเดท firmware)
What's New ใช่ (ผ่านการอัพเดท firmware)

ความบันเทิง
BRAVIA Internet Video ใช่
BRAVIA Internet Widgets ใช่
Wi-Fi Wireless LAN Ready (ต้องเชื่อมต่อผ่าน Wi-Fi adaptor UWA-BR100)

ฟังก์ชั่นสำหรับการประหยัดพลังงาน
โหมดการปิด Backlight ใช่
Presence Sensor ใช่
ตัวตรวจจับสัญญาณแสง ใช่
วัสดุหีบห่อ กล่องแบบรีไซเคิล (มากกว่า 70%)

ทั่วไป
ความต้องการพลังงาน AC 110-240V, 50/60Hz
การกินไฟ ประมาณ 109 วัตต์ (ขณะทำงาน)
การกินไฟขณะปิดเครื่อง ประมาณ 0.25W
ขนาด (กว้าง x ยาว x ลึก) ม.ม. พร้อมขาตั้ง ประมาณ 799 x 532 x 230 มม.
ขนาด (กว้าง x ยาว x ลึก) ม.ม. ไม่มีขาตั้ง ประมาณ 799 x 502 x 70 มม.
ขนาด (กว้าง x ยาว x ลึก) ม.ม. พร้อมขาตั้ง ประมาณ 11.4 กก.
น้ำหนักโดยไม่มีขาตั้ง ประมาณ 8.7 กก.

อุปกรณ์เสริมที่มาพร้อมตัวเครื่อง
รีโมทควบคุมการทำงาน RM-GD020
แบตเตอรี่ 2 x AAA


จากนั้นก็อัพเดตของซอฟต์แวร์ระบบ (เวอร์ชั่น 3.121GAA) เนื่องจากของเดิมเป็น 2 กว่าๆ
สิ่งที่ได้มาก็ตามนี้
- Skype
- Twitter
- Facebook
- Media remote
- VAIO Remote Keyboard
- Audio Theatre Control Widget

ขั้นตอนการ up firmware ดูได้ที่ http://www.sony.co.th/support/download/450329
review TV ดูได้ที่
http://www.lcdtvthailand.com/review/detail.asp?desc=1&param_id=767

Lync Control Panel

ในการเข้าหน้า Lync Control Panel แล้วขึ้นข้อความ HTTP Error 403.14 - Forbidden หรือว่า permission ให้แก้โดยทำการ trust site นั้นซะ หรือเข้าทาง website ที่เครื่องอื่นโดยผ่าน https://Server.domain.com/cscp ก็ได้ แต่ต้อง trust เช่นกัน

Friday, May 20, 2011

Windows Server 2008 R2 Evaluation (180 days)

How to manually rearm the 10 day activation grace period
When the initial 10-day activation period nears its end, you can run the Slmgr.vbs script to reset it back to 10 days. To do this, follow these steps:
  • 1. Click Start, and then click Command Prompt.

  • 2. Type slmgr.vbs -dli, and then press ENTER to check the current status of your activation period.

  • 3. To reset the activation period, type slmgr.vbs –rearm, and then press ENTER.

  • 4. Restart the computer.


  • This resets the activation period to 10 days, and can be used up to five times. After this you will need to either activate or reinstall the evaluation.

    Wednesday, May 18, 2011

    Remote Server Administration Tools (RSAT)

    Remote Server Administration Tools (RSAT) for Windows 7 Service Pack 1 (SP1) Available for Download
    ไมโครซอฟท์ออก Remote Server Administration Tools (RSAT) สำหรับ Windows 7 Service Pack 1 (SP1)
    Remote Server Administration Tools (RSAT) สำหรับ Windows 7 SP1 เป็นเครื่องมือฟรีที่ไมโครซอฟท์พัฒนาขึ้นมาเพื่อให้แอดมินใช้จัดการหน้าที่และคุณสมบัติ (Roles and Features) บนเครื่องคอมพิวเตอร์ที่ใช้ระบบปฏิบัติการ Windows Server 2008 R2 SP1 หรือ Windows Server 2008 R2 หรือจัดการหน้าที่และคุณสมบัติ (บางอย่าง) ของ Windows Server 2008 และ Windows Server 2003 ในแบบรีโมทในสภาพแวดล้อมแบบ Active Directory Domain Services (AD DS) จากเครื่องคอมพิวเตอร์ที่ใช้ระบบปฏิบัติการ Windows 7 หรือ Windows 7 SP1

    RSAT มีการทำงานลักษณะเดียวกันกับเครื่องมือ Administration Tools Pack (Adminpak) สำหรับ Window Server 2003 และ RSAT สำหรับ Windows Vista SP1 โดย RSAT สามารถรองรับการจัดการหน้าที่และคุณสมบัติบน Windows Server 2008 R2 SP1 หรือ Windows Server 2008 R2 ทั้งที่ติดตั้งแบบ Server Core และ Full Installation แบบรีโมทได้อย่างสมบูรณ์ ในขณะที่สามารถจัดการหน้าที่และคุณสมบัติบางอย่างของ Windows Server 2008 และ Windows Server 2003 (ไม่มีโหมด Server Core) ในแบบรีโมท

    Reference :
    http://thaiwinadmin.blogspot.com/2011/04/rsat-for-windows-7-sp1.html
    http://www.microsoft.com/downloads/en/details.aspx?FamilyID=7d2f6ad7-656b-4313-a005-4e344e43997d

    Monday, May 09, 2011

    ราชบุรี

    เพื่อนแต่งงานที่ราชบุรีก็เลยหาโอกาศแวะเที่ยวซักหน่อย เส้นทาง กรุงเทพ-จอมบึง
    ตื่นแต่เช้า ออก 6.30 ออกพระรามเก้าขึ้นทางด่วน มุ่งตรงคาวคะนอง ->สมุทรสงคราม
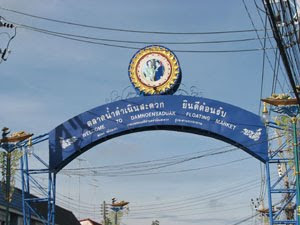
    แวะ ตลาดน้ำดำเนินสะดวกก่อน 8.00

    คนไม่ค่อยเยอะเท่าไหร่ หรือว่ามาผิดเวลาก็ม่ายรู้
    คิดว่าอัมพวาน่าเที่ยวกว่าห่างกัน 10 กว่าโลได้
    วิ่งต่อเข้าตัวเมืองราชบุรี วนหลายรอบเข้าทั้ง โรบินสัน lotus ซันนี่ (หลง)
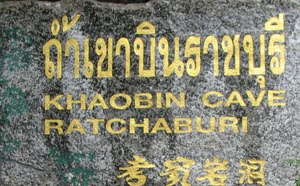
    สุดท้ายหาทางออกไปจอมบึงประมาณเที่ยง มุ่งตรงเขาบิน ระหว่างทางเจอฝนหนักเหมือนกัน
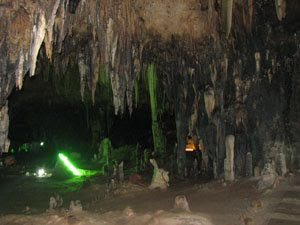
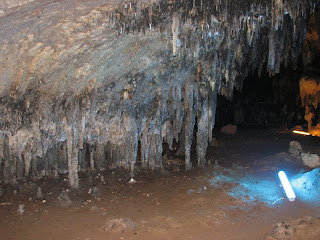
    ก่อนเข้า หนาวมากเนื่องจากฝนตกข้างนอกแต่เวลาเข้าไปกลับ ร้อนมาก เหงื่อเต็มเลย อากาศเบาบาง
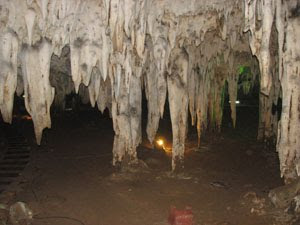
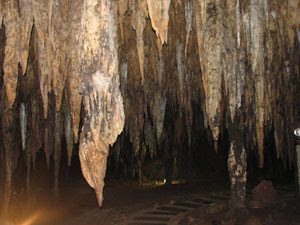
    เดินตามทางตามป้าย

    มุ่งตรงงานแต่ง ที่จอมบึง
    ขากลับวิ่งเข้านครปฐม ปิ่นเกล้า คู่ขนานชนนณี ขึ้นทางด่วนตรงยมราชไปส่งพี่ที่รามอินทรา
    ทีแรกว่าจะกลับทางเดิมแต่ดัน ขึ้นสะพานข้ามแยกที่จะเลี้ยวขวาเข้า ดำเนินสะดวก ก็เลยต้องเลยตามเลย

    Thursday, April 28, 2011

    เปลี่ยน harddisk ที่ลง windows7

    เปลี่ยน Harddisk notebook จาก 250G เป็น 500G

    250G

    - 100m Boot ตอนลง window 7 แบ่งให้

    - 50m->C

    -100m ->data

    -100m ->data

    500G

    - 60m->C

    -140 ->data

    -200m ->data

    ขั้นตอนทำก็ใช้ ghost partition to partition จากนั้นก็ set active partition

    แล้วก็ copy file ใน partition 100M ของเก่าซึ่งเป็น boot record ได้แก่(file ซ่อนอยู่)

    Folder Boot

    File bootmgr, BOOTSECT.BAK

    ไปไว้ที่ Drive C ของ harddisk ตัวใหม่ จากนั้นใช้ BCDEdit ซึ่งอยู่ใน แผ่น hiren แก้ file ที่ชื่อ BCD ซึ่งอยู่ใน Folder Boot

    Browser file BCD

    แก้ไขในส่วนboot disk และ Partition จากนั้น save current


    ขอบคุณข้อมูล
    http://www.gggcomputer.com/10364
    http://www.gggcomputer.com/9957

    Wednesday, April 06, 2011

    ล้างปีกผีเสื้อ กับ เช็ควาล์ว

    ล้างปีกผีเสื้อ กับ เช็ควาล์ว


    ถอดฝาครอบออกมาเช็ค วาล์ว แล้วก็มีเครื่องมือเป็นแผ่นสแตนเลน จิ้มๆเข้าไป

    ผลออกมา เห็นช่างเขียนเลข
    10 10 10 10 10 10 10 10
    11 12 10 .. ... อะไรทำนองนี้แหละ ช่างบอกวาล์วไม่ยัน แล้วก็เช็คหัวเทียนช่างบอกปกติ ก็เลยล้างปีกผีเสื้อ(เห็นในกระทู้ แนะนำกันจัง เลยลองดูมั่ง)

    ก่อนล้าง
    ถอดออกมายังไม่เขอะเท่าไหร่ ก็จัดการล้างด้วย เบนซิน + แปรงสีฟัน จากนั้นประกอบแล้ว start เครื่อง ฟังเสียงเครื่องรู้สึกแน่นๆ ไม่รู้คิดไปเองป่าว
    หลังล้าง

    ตั้งรอบ 1000 ลองทั้ง gas และ oil เปิดแอร์ ทดสอบ สรุปรอบอยู่ที่ 900-1000 rpm จากนั้น ช่างก็ล้างเป่าฝุ่นห้องเครื่องโดยใช้ น้ำมันแล้วก็ลมเป่าตามซอกเครื่องให้(ขอบคุณมากครับ) เพราะวันก่อน หนูเอากระดูกอะไรมาทิ้งไว้ไม่รู้ แล้วก็มีอึด้วย แล้วก็ถามเรื่องการดูแลเครื่อง ช่างเขาก็ให้คำแนะนำดีครับ
    สุดท้ายพาช่างนั่งไปลองรถ ก็ ok ครับ เร่งดี แต่รู้สึกช่วงเหยียบคลัชเปลี่ยนเกียร์เครื่องจะสั่น ช่างบอกเป็นที่ครัช ไว้วันหลังจะมาทำอีกครับค่าเสียหาย 1000 ครับ

    ช่าง กิจ 0830892995 อู่ ไทเกอแท็กซี่ อยู่ ซ.กำเนิดทรัพย์ 2 ถ.เพชรพระราม (อยู่ระหว่าง พระรามเก้า กับเพชรบุรี)
    แผนที่เอามาจาก http://www.fordfocusclub.com/forum/index.php?topic=8085.0
    อู่อยู่ที่ จุด A

    Monday, April 04, 2011

    งาน Motor Expo 2011

    ดาราที่เป็น Presenter


    ต่อภาษีรถประจำปี

    ต่อภาษีรถประจำปี ขณะนี้สามารถต่อได้ที่ คาร์ฟูร์ 13 สาขา ได้แก่สาขา (Shop Thru for Tax) อำนวยความสะดวกในการชำระภาษีรถประจำปีแก่ประชาชนในวันเสาร์-อาทิตย์ ที่ห้างคาร์ฟูร์ 9 สาขา ได้แก่ สาขาลาดพร้าว รามอินทรา รัชดาภิเษก บางปะกอก สำโรง แจ้งวัฒนะ เพชรเกษม อ่อนนุช และสุขาภิบาล 3 บางใหญ่ บางบอน ศรีนครินทร์ และสุวินทวงศ์ รวมมีสาขาให้บริการทั้งสิ้น 13 สาขา โดยไม่เสียค่าใช้จ่าย เสาร์- อาทิตย์ก็เปิด กรณี รถเก๋ง รถปิคอัพ รถตู้ อายุการใช้งานเกิน 7 ปี หรือรถจักรยานยนต์ อายุการใช้งานเกิน 5 ปี จะต้องมีใบรับรองการตรวจสภาพรถจากสถานตรวจสภาพรถเอกชน (ตรอ.) มาแสดง ทั้งนี้ จะมีสมุดคู่มือจดทะเบียนรถหรือไม่ก็ได้ โดยเจ้าของรถจะได้รับเครื่องหมายการเสียภาษีประจำปี (ป้ายวงกลม) ทันที เช่นเดียวกับมาชำระที่กรมการขนส่งทางบก หรือสำนักงานขนส่งทั่วประเทศ
    http://www.insurancedd.com/index.php?mo=3&art=552879

    Thursday, March 31, 2011

    Group Policy to hide a hard drive With Group Policy Objects in Windows


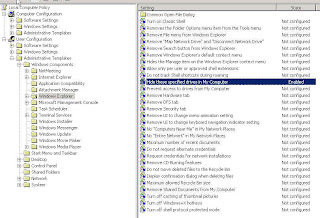
    There is a “Hide these specified drives in My Computer” option that lets you hide specific drives.

    This article describes how to use Local Group Policy to hind the C drive of a Terminal Services.

    1. To open group policy, run gpedit.msc. Or start the Microsoft Management Console (MMC). On the Console menu, click Add/Remove Snap-in to add Policy Object (GPO) for the local computer.

    2. Open the following sections: User Configuration, Administrative Templates, Windows Components, and Windows Explorer.

    3. Double-click Hide these specified drives in My Computer.

    4. Check Enabled under Hide these specified drives in My Computer check box (Figure).

    5. Select Restrict C Drive only under Pick one of the following combinations.


    6. Click OK to save the settings.

    Monday, March 28, 2011

    ต่อสาย แวคคั่ม

    ซื้อสายมาครึ่งเมตร 75 บาท(เมตรละ 140) ไมรู้แพงป่าว

    จัดการตัดแล้วต่อเลยเอาข้อต้อ 3 ทางออก โดยต่อตรงไม่เอา auto lope เข้ามาร่วมด้วย


    ส่วนกระปุก autolope เด่วเอาออกทีหลัง ตอนนี้ปิดจุกไปแล้ว

    ไม่รู้ว่าจะวิ่งแรงกว่าเดิมไหม เด่ววันเสาร์ใช้รถแล้วค่อยว่ากัน


    Sunday, March 27, 2011

    หนูกัดสายยางในรถ

    สงสัยจอดไว้นาน
    ทีแรกเห็นเศษกระดูกไก่บ้าง ขี้หนูบ้างก็คิดว่า แค่มาทักทาย ที่ไหนได้ วันนี้ลงไปดูรถ กระจะดูเรื่อง พรบว่าหมดเมื่อไหร่ ก็เลยเปิดกระโปรงดูหน่อยแล้วกันเผื่อน้ำอะไรพร่องบ้างจะได้เติม เลยไปจ๊ะเอ๋ สาย ขาด เข้า
    ไม่รู้ว่าเป็นสายอะไร แต่มันคงขาดจากขั้วต่อสามทางอีกด้านมันต่อมาจาก ออโต้ลูปเลี้ยงบ่าวาว คิดว่าน่าจะไปซื้อสายมาต่อเองก็น่าจะได้ แต่ว่า จะต่อตรงโดยไม่ใช่ บ่าวาว หรือป่าวเด่วดูอีกที เพราะเห็นมีคนบอกว่า ต่อออโต้ลูปเลี้ยงบ่าวาวไม่ดี


    แต่ไอ้ตัวที่คล้ายมอเตอร์ ที่ ขั้วต่อสามทางต่อไปด้านบนมันคือตัวอะไรอ่ะ เห็นเป็น denso toyota อะไรนี่แหละ

    Monday, March 21, 2011

    เก็บบัตรเครดิต visa ได้


    กำลังจะกดเงิน ตู้ ATM bank กรุงเทพ โดยเอา ATM ใส่ตู้ แต่ใส่ไม่เข้า เนื่องจากมีบัตรเครดิต standard charter visa เสียบคาไว้อยู่ จึงเริ่มมองหาเจ้าของ แต่ไม่มีในระแวกนั้นถามคนขายของเขาบอกรู้สึกว่าเป็น ชาย กดก่อนหน้านี้แต่ไม่รู้ไปไหนแล้ว เอาละซิ ทำไงหว่า เริ่มดูที่บัตรอีกครั้ง ชื่อก็ไม่มี มีแต่ตัวเลข ลายเซ็นก็ไม่มี(น่าเอาไปรูดซื้อของ) ยังพอมีเบอร์โทร ศูนย์ จึงโทรไปแจ้งให้ทางศูนย์ติดต่อเจ้าของบัตรแล้วโทรกลับมาจะได้เอาบัตรไปให้ 10 นาทีเสียงโทรศัพท์ดังขึ้น "ผมลืมบัตรไว้ที่ตู้ ATM พอดีคุยเพลิน...." ก็เลยถามข้อมูลนิดหน่อยแล้วก็เอาบัตรไปให้ แต่ดูเขาไม่ค่อยเดือดร้อนเท่าไหร่แฮะ

    แม่สอนว่าใจเขาใจเรา ของของเขาเราอย่าไปเอา ของของเราถ้ามีมากก็แบ่งปันกัน